Log In
Using recommended web browsers such as Google Chrome or Mozilla Firefox, you may log in to Cascade with your Emory netid and password. Your netid must be all lower case.
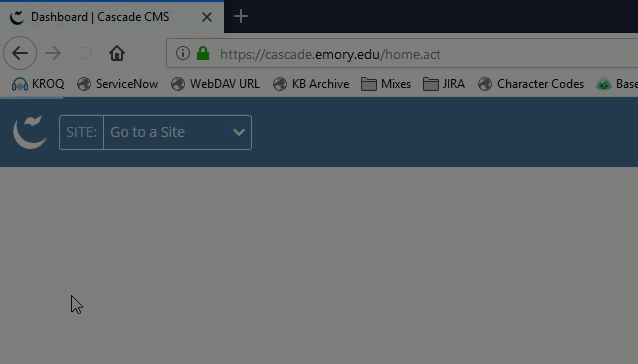
Sign in to CascadeBookmark this URL cascade.emory.edu
Back to top
Everything you need to know to get started managing your content in Cascade.
Using recommended web browsers such as Google Chrome or Mozilla Firefox, you may log in to Cascade with your Emory netid and password. Your netid must be all lower case.
Sign in to CascadeBookmark this URL cascade.emory.edu
Back to topBy default, the dashboard includes the following widgets:
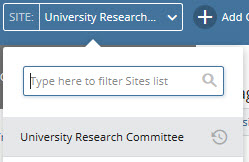
To access your site in Cascade, click the drop-down menu next to the Cascade Server logo ![]() and select your site from the list. You may also search for your site by typing into the drop-down menu.
and select your site from the list. You may also search for your site by typing into the drop-down menu.
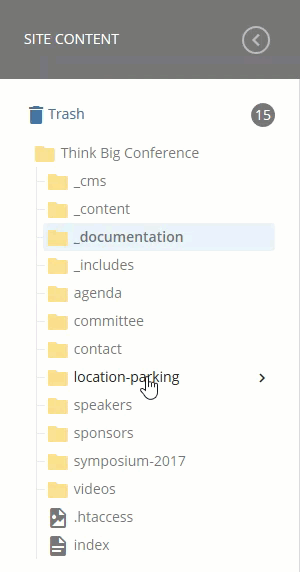
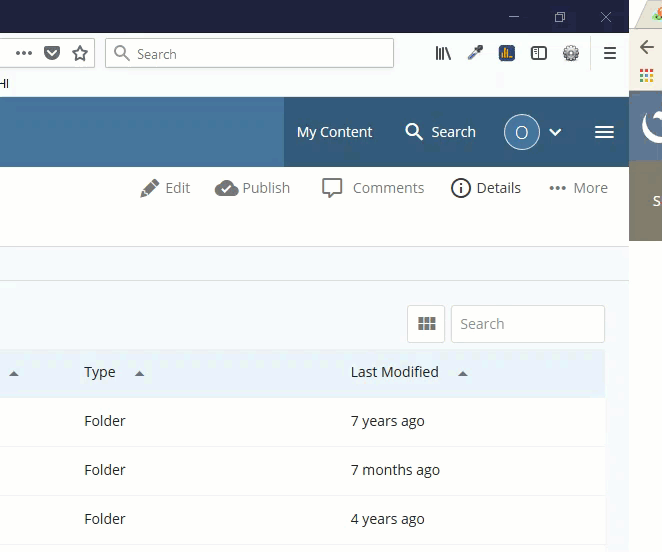
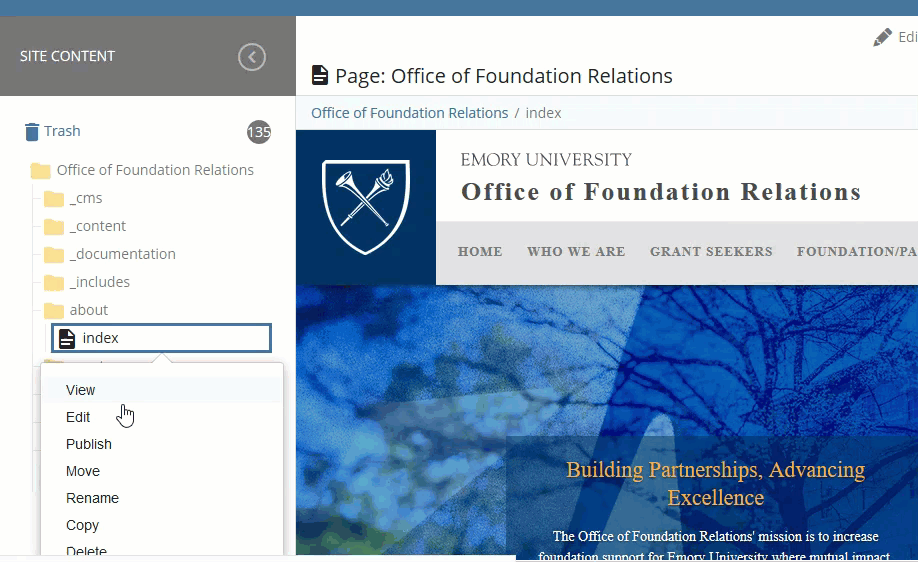
The folder view is an easy way to see and access the files and folders that make up the website. Click the folder name to quickly expand its view; right click on a folder or file to select it for further action.
The following icons are used to represent various items in your website:
 are shown with the paper icon
 are shown with the photograph icon
Images (JPG or GIF) and documents (PDFs) are typically stored in subfolders.
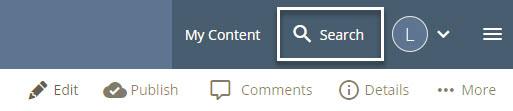
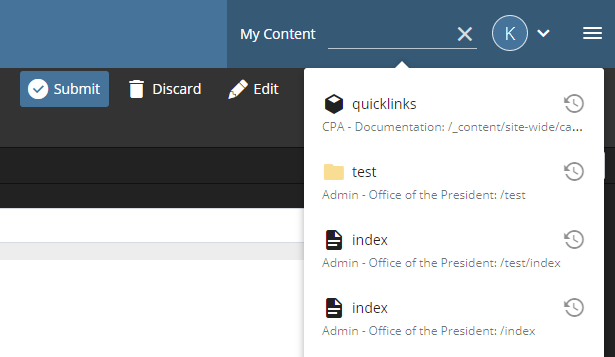
The Search Bar is always available in the top right corner of your web browser when logged in to Cascade.
Using search, you can quickly navigate to content blocks, pages, and documents by entering keywords, titles, and names. Click the search bar to reveal and navigate to recent assets.
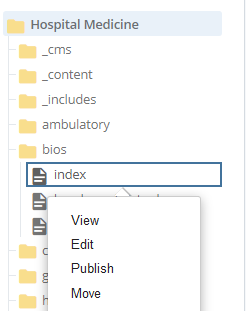
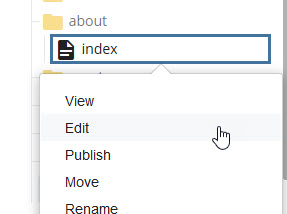
To edit a page, navigate to the page in Cascade and click the edit button  , or right click on the page in the folder structure and select edit. A screen will pop up with your page in edit view.
Many of your pages are interior pages, which use a WYSIWYG editor to input content.
Back to topCascade's WYSIWYG editor isn't a mere clone of Microsoft Word, so let's go over how to add and format your content.
Common text editing options include:
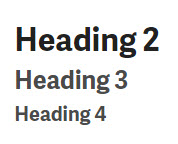
Heading hierarchy is an important component of structuring your writing, enabling your readers to easily absorb and understand your content.
To select different headings, select the text that you want to be a heading, then click on the dropdown menu that says "Formats".
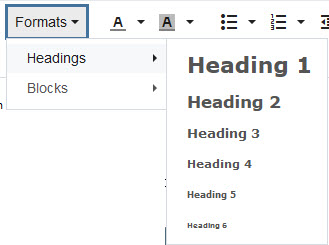
Only use Headings 2 through 4.
Proper heading hierarchy allows Google, Bing, and other search engines to better index and promote your website for new readers to find. Finally, proper use of headings is important for maintaining ADA compliance, extending our reach to more audiences.
Pasting text from an application such as Microsoft Word or Google Documents is easy.
CTRL + C to copy, then CTRL + V to paste.
Command + C to copy, then Command + V to paste.
When you paste your text, it might appear sloppy in the Cascade WYSIWYG editor.
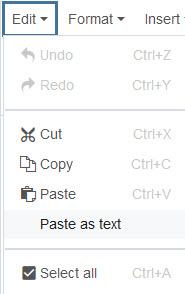
It is highly recommended that you use the Paste as Text option located in the Edit dropdown menu.
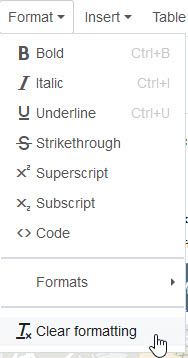
Use the format menu and click the Clear formatting option shown below.
This removes extraneous styling tags that might cause your text to show up differently than you intend.
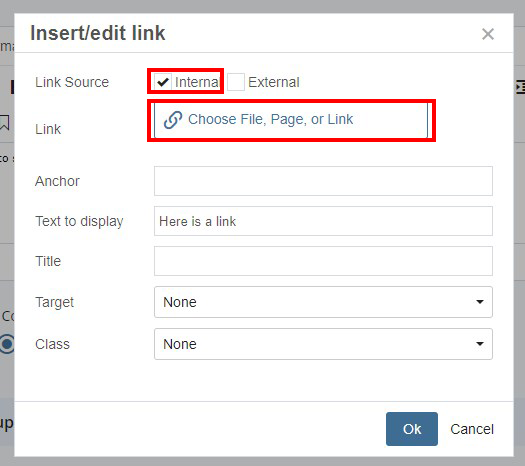
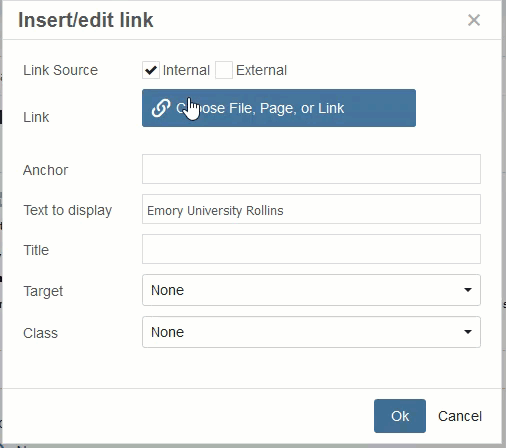
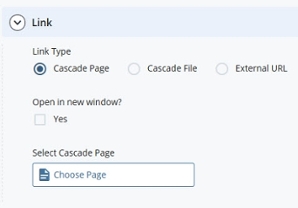
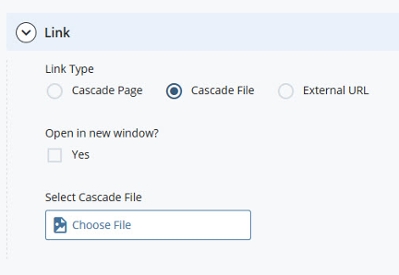
There are several types of links to send your readers around the web.
The internal link sends your reader to another part of your website.
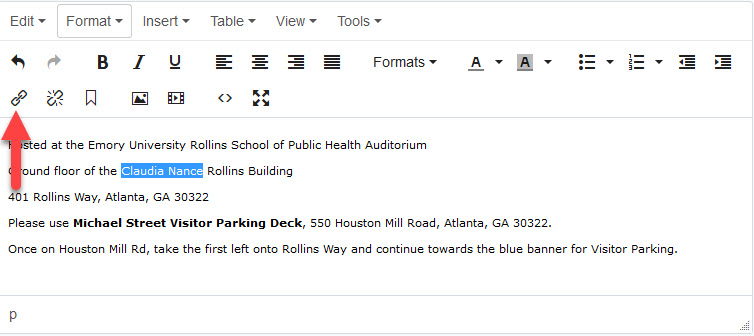
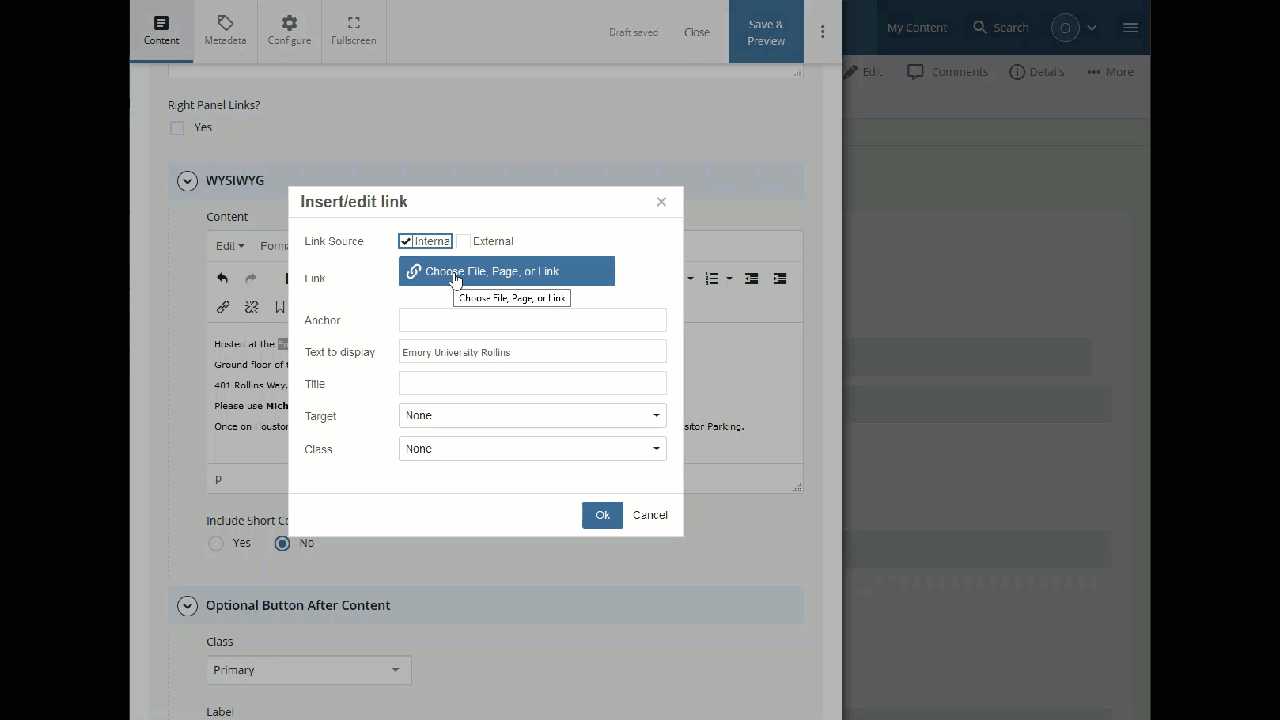
To link to an internal page or file that exists in Cascade, select the text you'd like to link and click on the Link icon: 
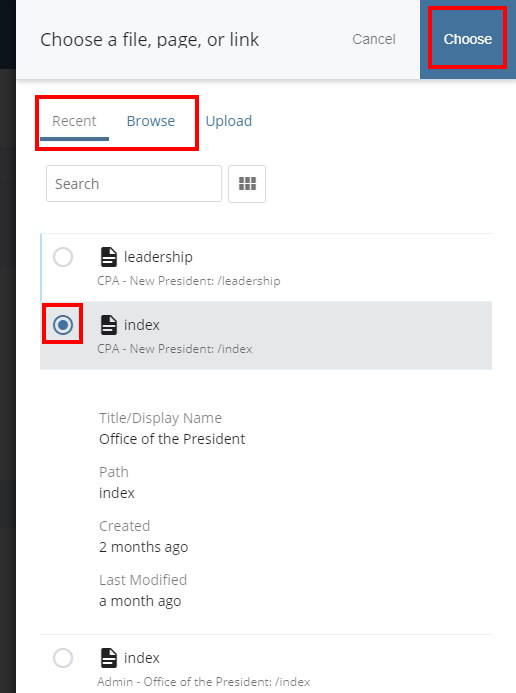
Click Choose File, Page, or Link, then navigate to the page or document you wish to link to.
When choosing an internal link asset, there are several options.
The Recent assets tab is selected by default. Click on the Browse tab in order to bring up the asset browser.
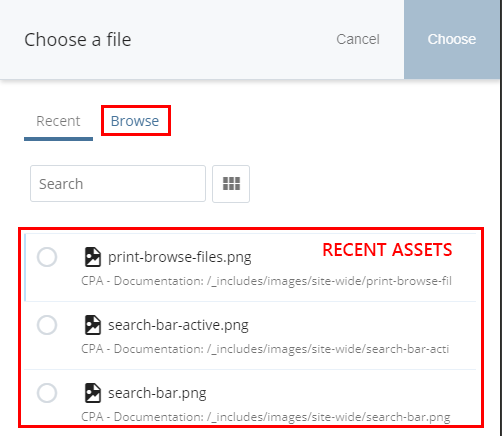
Select a link by clicking on the radio button (gray circle) to the left.
Once you have selected your link, click the "Choose" button.
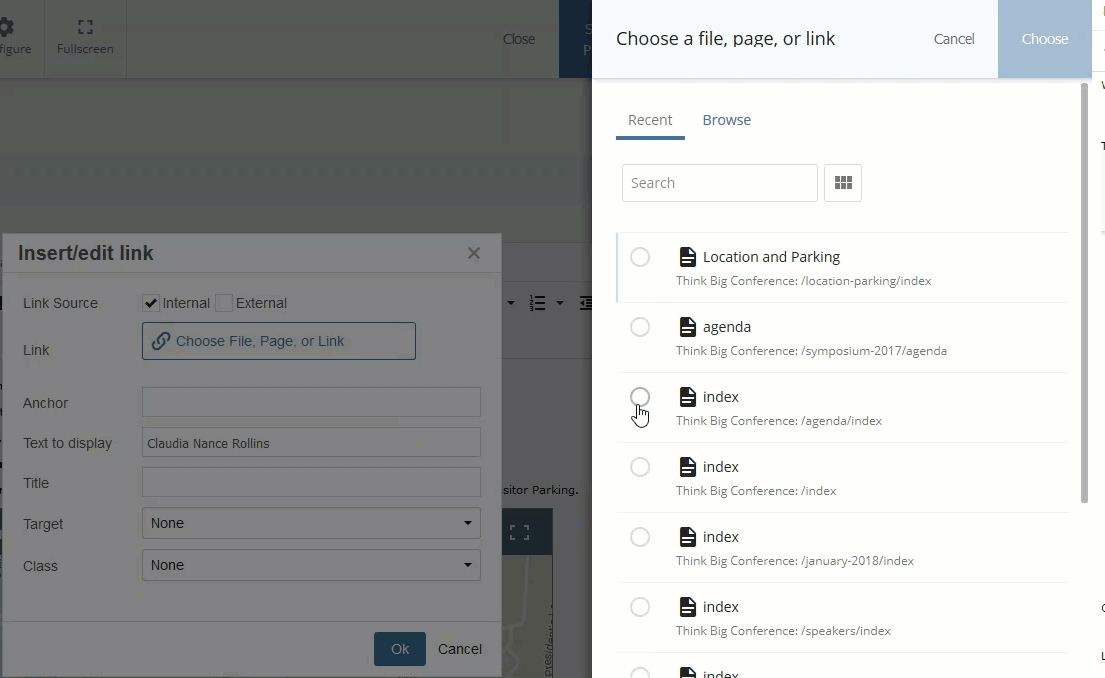
Last, insert the link with the bottom right button:
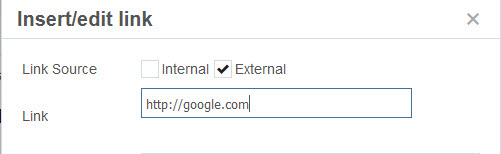
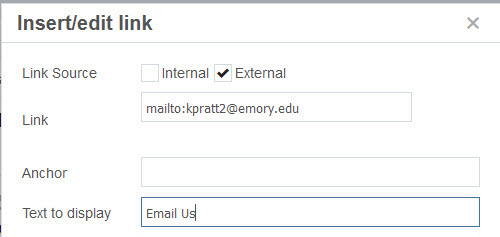
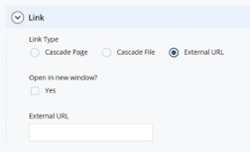
Choose External, then paste in the full URL.
Choose the External link option. In the address box, type mailto: followed by the email address:
Example: mailto:person@emory.edu
Select the link you wish to remove, then click the Remove Link button
Shortcodes allow images or content blocks to be imported into a WYSIWYG interface.
Shortcodes must be entered in a specific format to work. They must begin with "[!" have lowercase content and end with "!]".
Shortcodes begin with...
Then proceed with lowercase text...
And close with...
Example: [!imgblock!]
Try to be descriptive with the content that names the shortcode so that it's easier to figure out which block might have been used when editing the page later.
Shortcode names can only container numbers and letters - no special characters, including dashes (-) and underscores (_).
To include shortcodes in the WYSIWYG, select Yes next to Include Shortcodes.
Select the Type: Block or Image
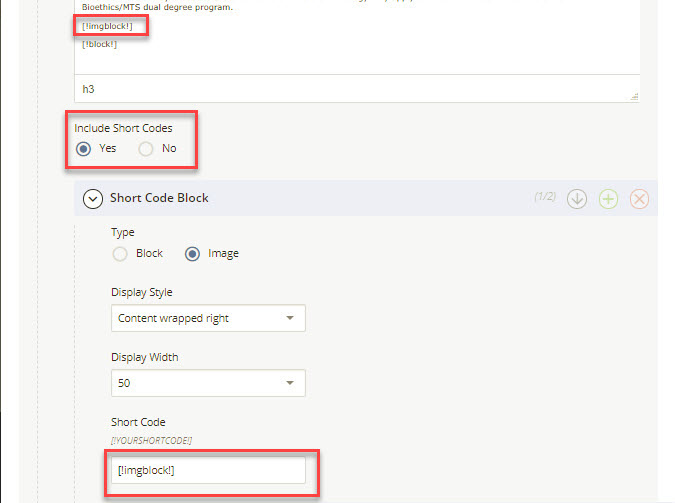
In the Shortcode field, enter in the exact code that was used in the content. This is how the block will map to that point on the page.
Image - If Image was selected, choose the image file  and navigate to the image in the /_includes/images folder. Select whether the image will have a caption and fill out the caption information if so.
Block - If block was selected, select the block in Cascade under /_content.
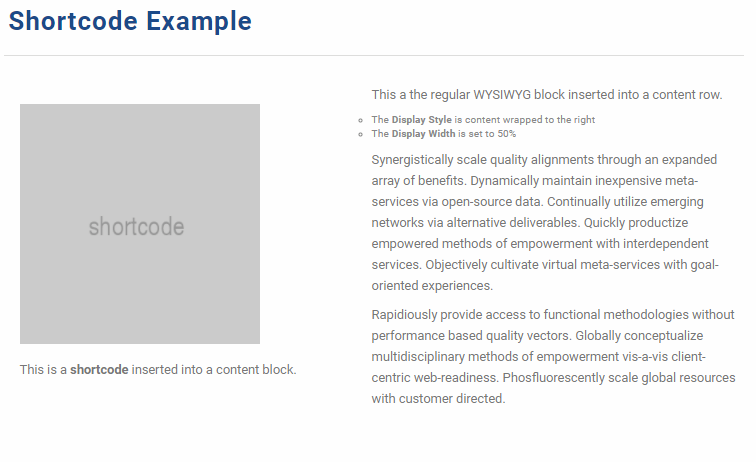
This example shows a shortcode inserted into a content block with the Display Style set to content wrap to the right and the Display Width set to 50%.
Multiple Shortcodes can be included in the WYSIWYG. Simply add another shortcode in the content editor, click the green plus icon and add another block or image for that shortcode.
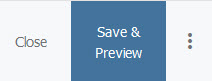
Click "Save & Preview" in the top right corner of the pop-up window.
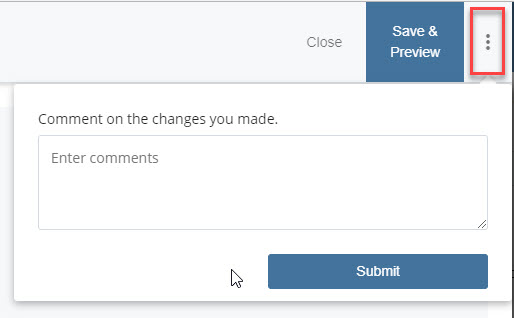
If you're satisfied with your changes, click the blue Submit button. Optionally, add a brief description in the small pop-up box describing your addition or edit - this will appear on your page's version history. If you'd like to discard your changes, use the Discard button
![]()
If you'd like to bypass the Save and Preview step, you can use the dots icon to directly submit your changes.
If you are satisfied with your page, you must Publish it to go live. Learn How
Back to topImages and documents must be proactively uploaded to Cascade before you can place them on your webpages.
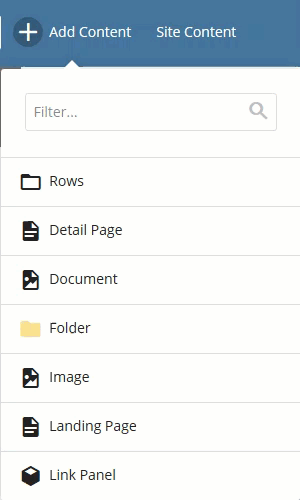
To add a document or image to Cascade, use the Add Content > Document or Add Content > Image menu option.
After selecting your file, click the three-dot menu and Submit to proceed.
Last, make sure to publish the file to the server for future use. Click the Publish tab, and click Submit at the bottom.
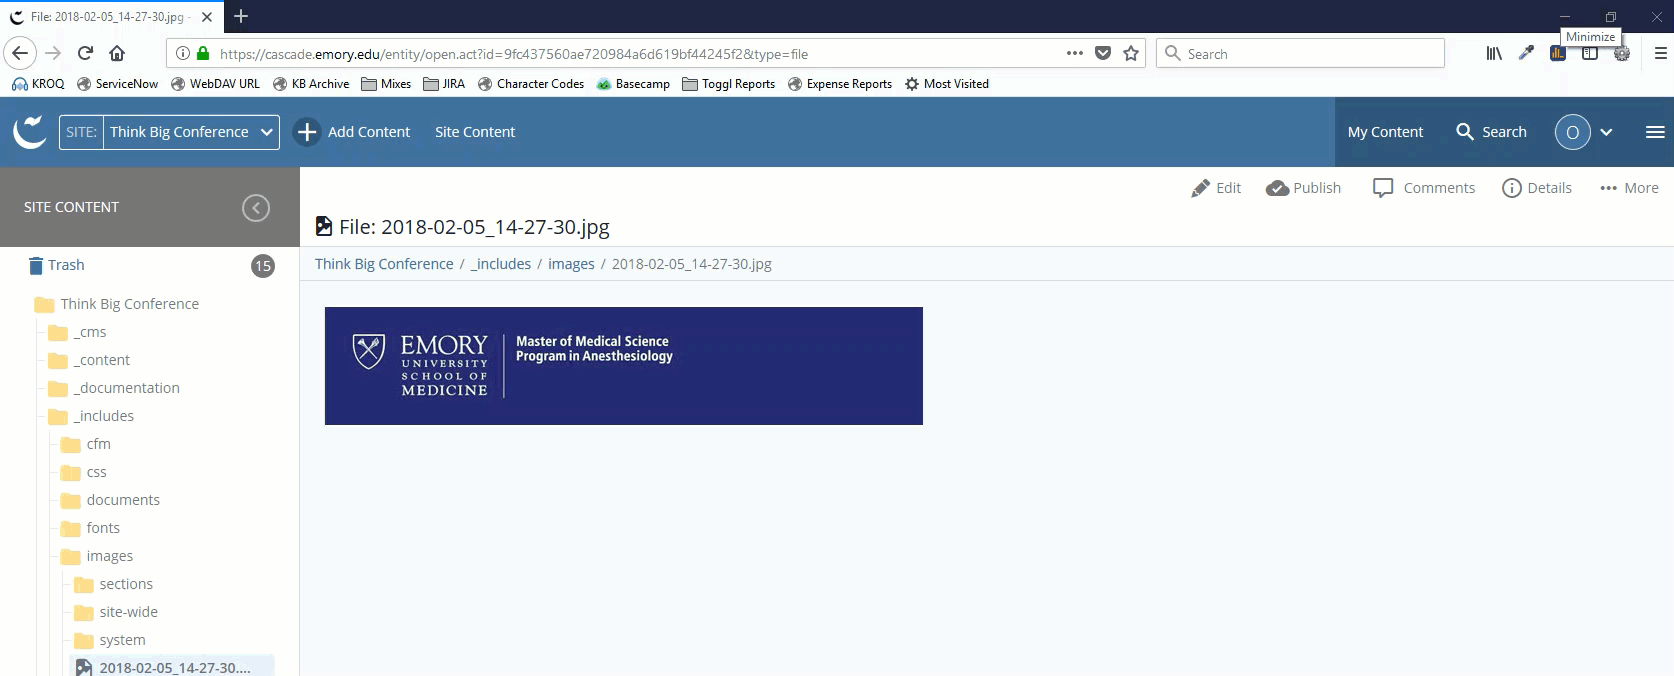
You may also right-click the item in the left-hand file tree and select "publish" in the dropdown menu.
You can link to documents in the WYSIWYG just as you can link to a page.
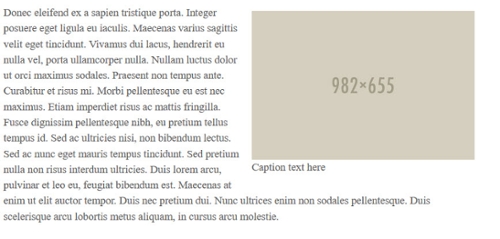
Generally an image should be a visual enhancement of text content and images should not contain text themselves. Images of fliers, for example, should not be used as they contain text that would not be readable by anyone using a screen reader.

In the example above, there are several accessibility issues:
In general, please do not upload images of fliers or any other text-heavy images to a site. If you want to link to a flier, you can upload it as a PDF and link to it from your site.
Generally an image should be sized to the exact specifications provided in this document before it is uploaded to Cascade. Large images can slow the loading of a page, especially for those on mobile without access to a wireless connection. Do not upload any image exceeding 2000px wide.
Often, portraits are taken vertically, and despite using a high-quality or high-resolution image, a vertical portrait simply cannot be made to fit into a horizontal space.
In the example below, the image size is 1536x1920.
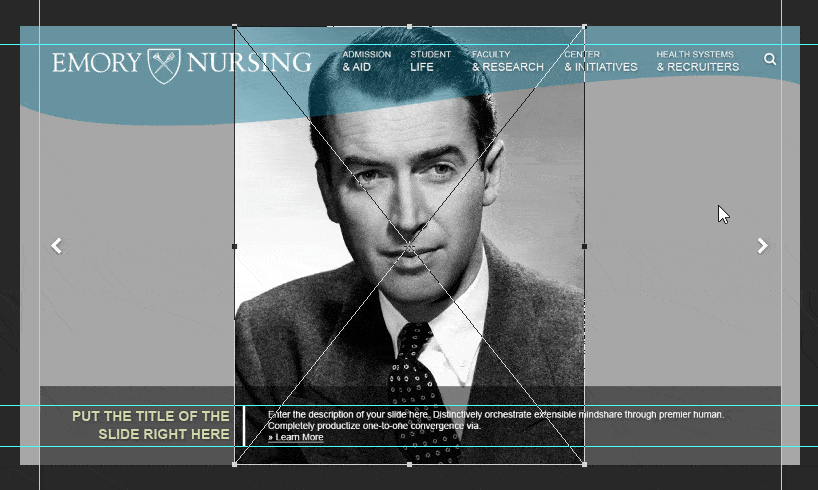

The issues:
Small images cannot be blown up to appear in a large space. The image must be stretched beyond its limits to fill the frame, resulting to a significant decrease in image quality.
In the example below, the image size is 300x200.
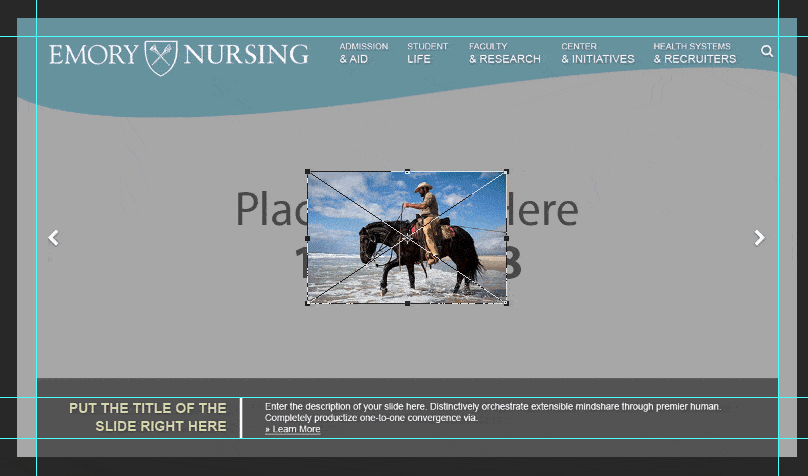
The issue:
The image is extremely pixelated (blurry) and appears unprofessional
It is always better to provide a large image to size down rather than attempt to fill a smaller image in a larger space
There are several types of pages to add to your website, and each type has a different purpose.
To add a page, go to the Cascade menu in the top left corner of the window, then click New > Page
Let's go over the basic input fields you will need to fill out in order to populate your pages with custom content.
When you create a new page, you assign a Page Name to it. This creates the filename for the page.
Page names must:
[!displayname!]
The Title field is used in several places. The most visible is at the top of the page over the opener image. It is also visible at the very top of the browser window.

Be sure your title is concise and clear to best benefit your readers and your SEO.
Summary: The 360 character summary provides details for the Open Graph Protocol, which enables your content to be richly embedded into a social media website such as Facebook or Twitter.
Teaser: The 140 character teaser is the excerpt that is pulled into feeds across the web.
Description: The 160 character description is shown in search engine results, such as Google or Bing.
Alternative Title: This title will override the default title in the top of your browser window tab.
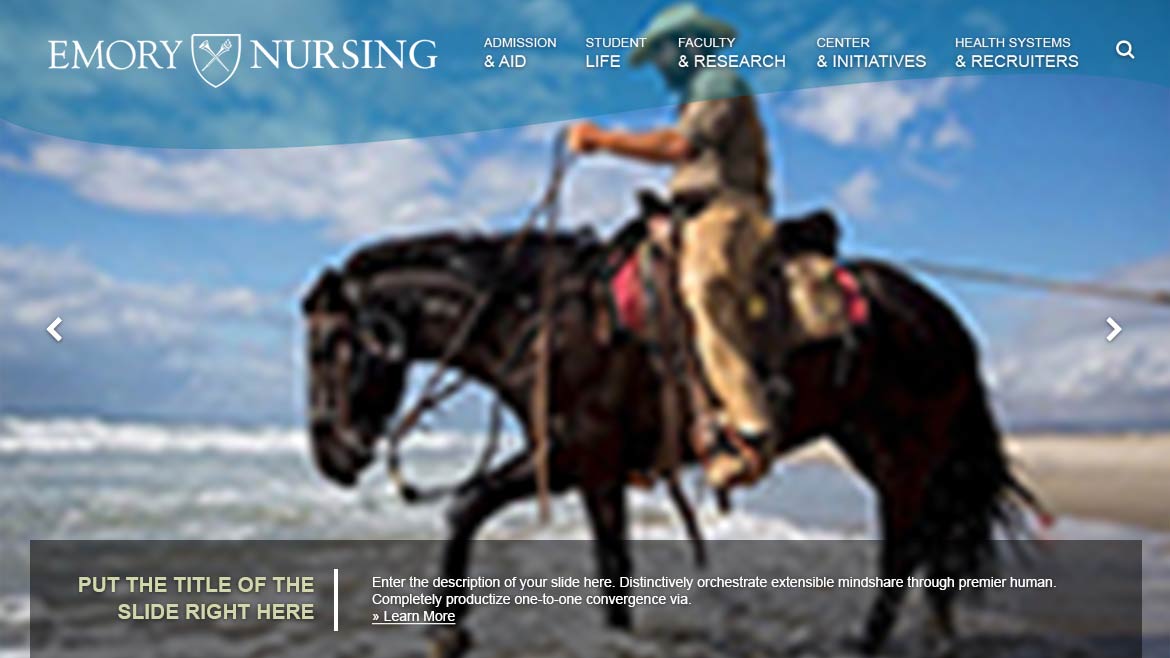
The homepage is made up of an opener image or slideshow and multiple rows of content blocks.
Choose between a static image or a slideshow of multiple images.
Abstract and Image or Full-Width Image

Large Abstract Image :
Browse to the image you want to insert by clicking the file icon ,
navigating to the /_includes/images folder, and selecting your image.
Add a brief description of the image in the Alt Text field (this helps visitors with visual impairments to know what the image contains).
All large abstract images must be 1170x1095px exactly.
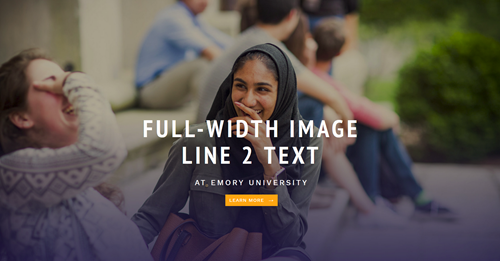
Full-Width Image :
Browse to the image you want to insert by clicking the file icon ,
navigating to the /_includes/images folder, and selecting your image.
Add a brief description of the image in the Alt Text field (this helps visitors with visual impairments to know what the image contains).
All full-width images must be 1919x1291px exactly.
Carousel Slides
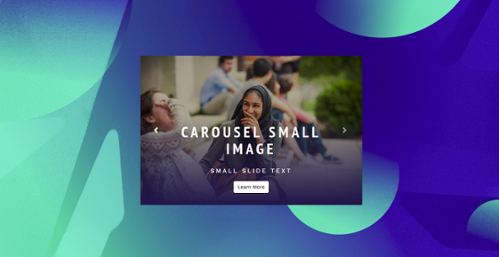

Small Carousel Image :
Browse to the image you want to insert by clicking the file icon ,
navigating to the /_includes/images folder, and selecting your image.
Add a brief description of the image in the Alt Text field (this helps visitors with visual impairments to know what the image contains).
All small carousel images must be 850x675px exactly.
Full-Width Image :
Browse to the image you want to insert by clicking the file icon ,
navigating to the /_includes/images folder, and selecting your image.
Add a brief description of the image in the Alt Text field (this helps visitors with visual impairments to know what the image contains).
All full-width images must be 1919x1291px exactly.
Organize, add, or remove items
 | To add an item, click on the + (plus sign) icon. |
 | To move an item up or down in the list, click on the up or down arrow icons. |
 | To delete an item, click on the X icon. |
To create a new Interior Page, use the Add Content > Page menu option.
Opener Image :
Browse to the image you want to insert by clicking the file icon ,
navigating to the /_includes/images folder, and selecting your image.
Add a brief description of the image in the Alt Text field (this helps visitors with visual impairments to know what the image contains).
All opener images must be 1689x639px exactly.
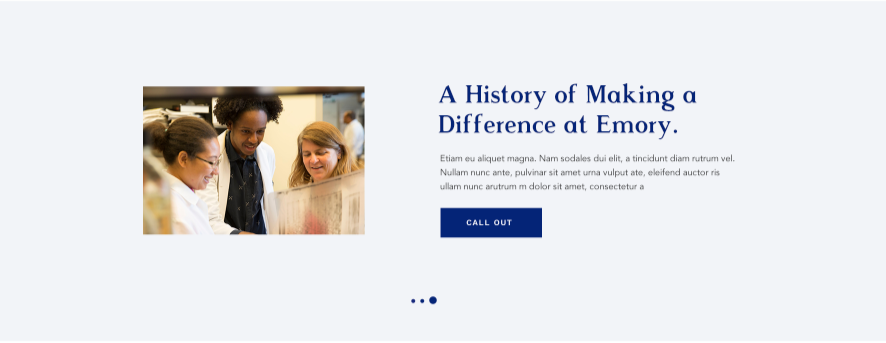
Content Image :
Browse to the image you want to insert by clicking the file icon ,
navigating to the /_includes/images folder, and selecting your image.
Add a brief description of the image in the Alt Text field (this helps visitors with visual impairments to know what the image contains).
All content images must be 1170x780px exactly.
Once you have finished adding and reviewing your content, the next step is to publish your page(s).
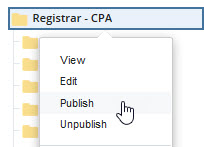
When viewing the page, click on the Publish button, or right click the page in the folder structure and choose Publish. Leave the default options as they are, then hit Submit.

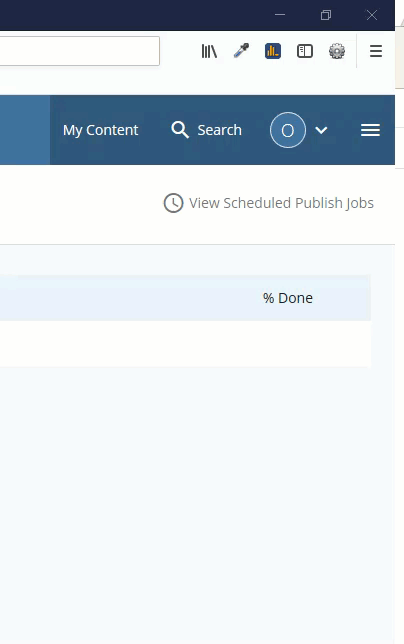
You may check on the progress of items you publish using the publisher.
Go to the top right menu > Publish Queue to see the status.
To confirm when your page has been published, you can go to the Home screen by clicking the Cascade Server logo ![]() and look under the Notifications heading for a confirmation message.
and look under the Notifications heading for a confirmation message.
You may publish an individual page which links to a file such as an image or document. You may also manually publish any individual files if desired.
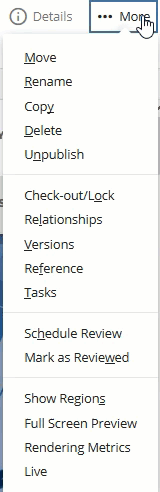
Under the More menu, click "Live" to access the live URL of the page.
Changes to the subnavigation will not be reflected site-wide until you publish the entire related section of the site.
If you want to update the right-hand navigation, such as change menu items or names, you must remember to publish all related pages that share the right-hand navigation.
For example, let's say you changed the name of a menu item under a particular section of your website from "CASAA Programs"...

...to just "Programs". This change will not occur unless you publish that entire section of the website.
To publish that section of the website, simply navigate to the parent folder and select Publish from the menu, then click Submit on the next page.
Now, all the related pages in that section will have updated right-hand navigation.
Warning: moving or renaming pages or files may cause links to break! After you move or rename the asset, check the relationships of your page by clicking More > Relationships. If relationships to other pages exist, you'll want to republish those pages.
Please consider the following before you move or rename:
Do not rename pages named index. This breaks your website navigation.
Back to topSometimes you just have to get rid of a page and start anew.
Warning: deleting items may cause links to break! Before you delete, check the relationships of your page by clicking More > Relationships. If relationships to other pages exist, you'll want to change those links before deleting the page.
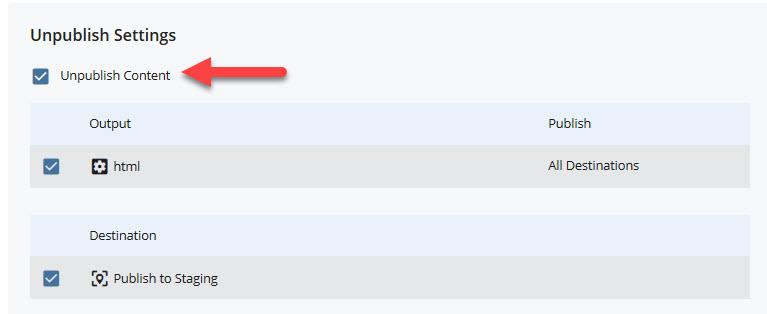
This option will remove the item from the live server first.
Also note: deleting pages named index may cause your navigation bars to break.
To delete an item, click on the More link, and select Delete.
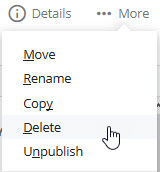
Hit Submit at the bottom of the screen to proceed with deleting your file.
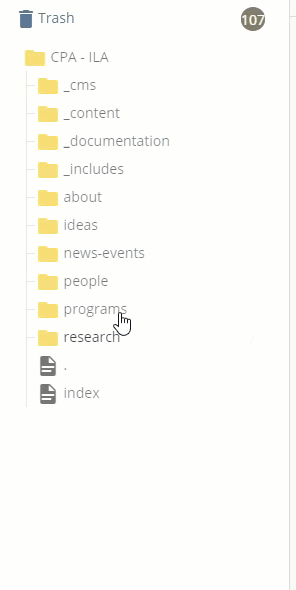
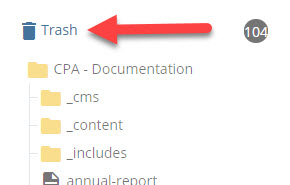
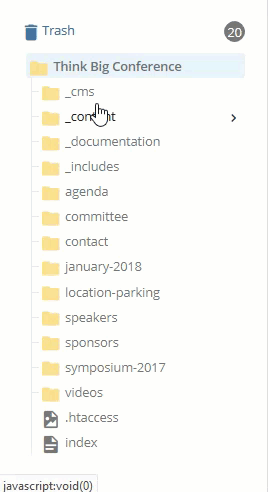
Back to topIf you accidentally delete a needed asset from Cascade, you can check the Trash to restore it.
Access the Trash from the top of the document tree on the left-hand side of the Cascade window.
Navigate the table to find the item(s) you wish to restore, check the box(es), then click the arrow icon on top left of the table:
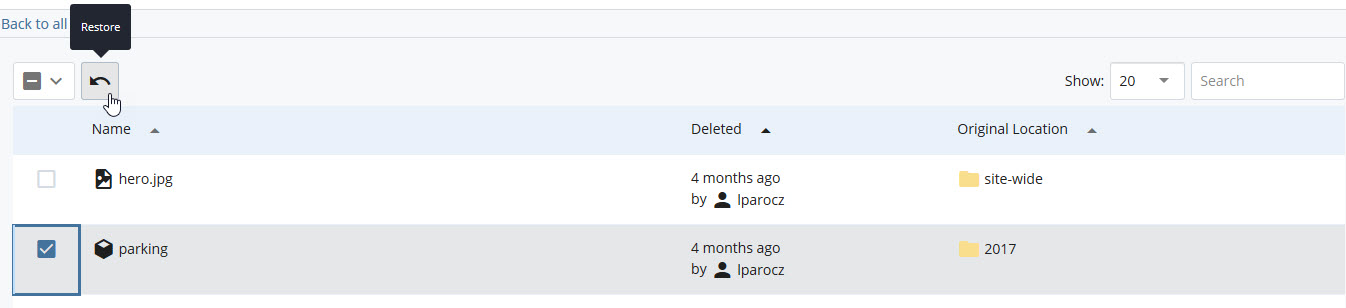
The asset(s) will immediately be restored.
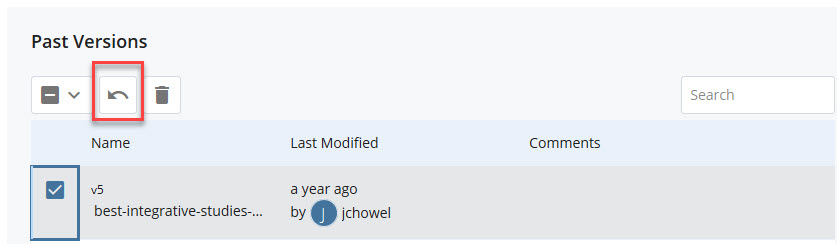
Back to topCascade allows you to view and restore older versions of your pages and files.
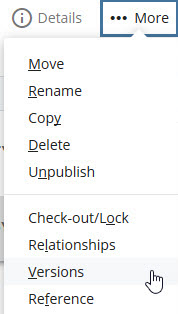
Once on a Page, Content Block, or File, click More > Versions to access the version history in the menu bar.
Here you will see a list of version dates and authors who previously made changes.
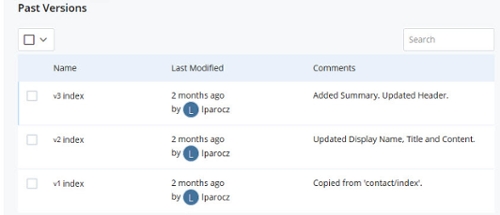
If you click on an item from the version history, you can see a preview of its content. The menu grants several options to proceed:
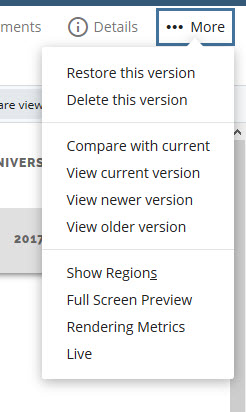
Most importantly, you may Restore the version you have selected.
You can also restore a version and compare versions in the list view by checking the checkbox next to the version you'd like to restore and clicking the backwards arrow icon or eye icon:
After activating a previous version, you must Publish that content for it to go live.
After you create a new page, it’s a good idea to check the folder order for your new page. The menu option you used may dictate what order your page gets created in. In most situations new items will be created last, but you can change this as needed.
The index file for each folder must be at Order #1.
Note: the Base Folder (Name of Website) view in the left column shows the contents in alphabetical order.

Please be aware that the folder and page order shown here is what determines the order of links that appear in your side navigation.
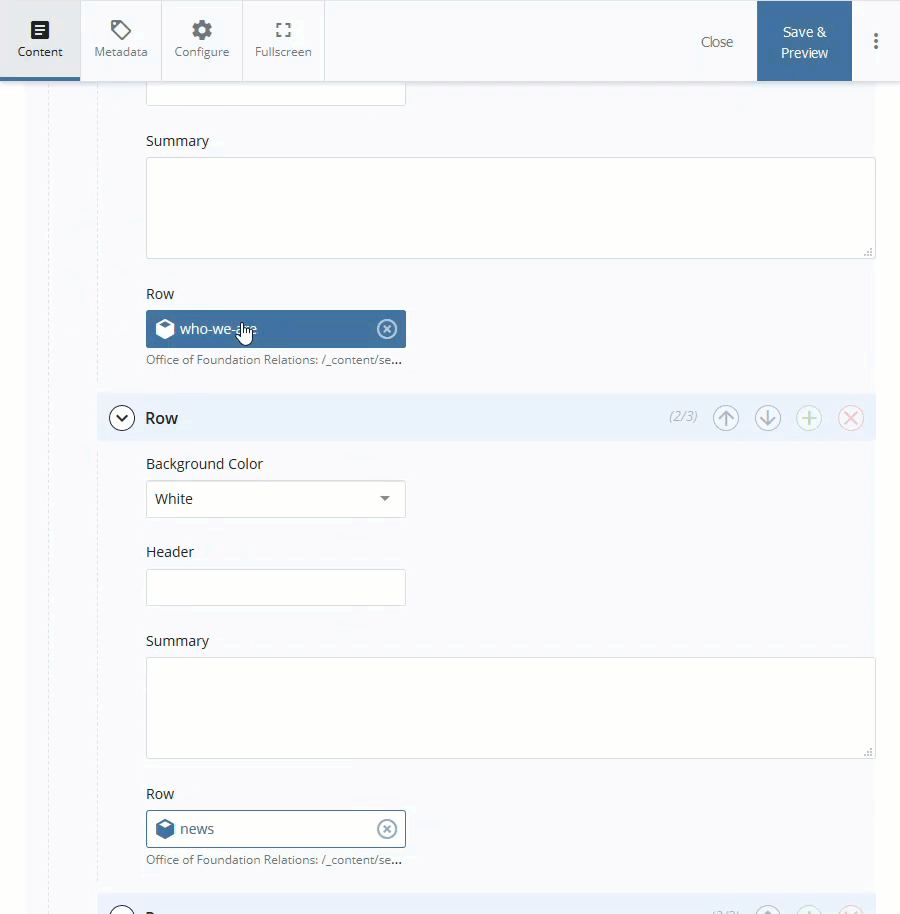
Back to topContent blocks are reusable sections of content that you can plug into different parts of your website.
You can find your content blocks in the /_content/sections subfolder, organized according to your top navigation structure.
Each page contains the option for content blocks stacked and arranged how you like.
There are two ways to edit the content contained in Content Blocks:
Click the Edit button.

Right click on the block you'd like to edit and select Edit to go directly to the block location.
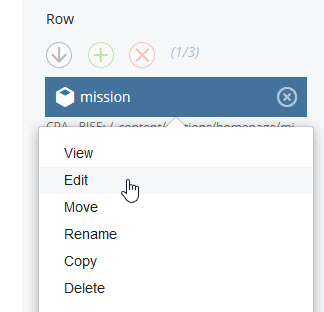
You will need to navigate back to the Page to view your changes after you've changed the block.
Navigate to the /_content folder to edit your block directly.
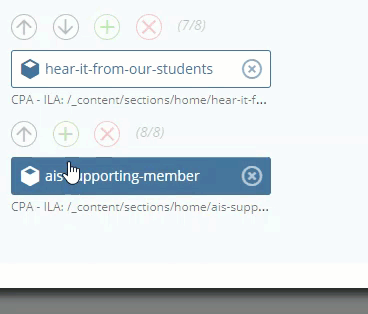
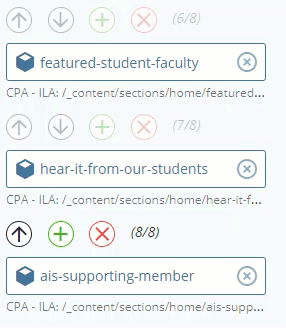
While editing the page, scroll down to view your content row section. Here you will see a green plus icon, a red X icon, and arrows  .
.
Click the green plus icon to add a new row.
 Back to top
 After adding your content row, assign your content block to the row.
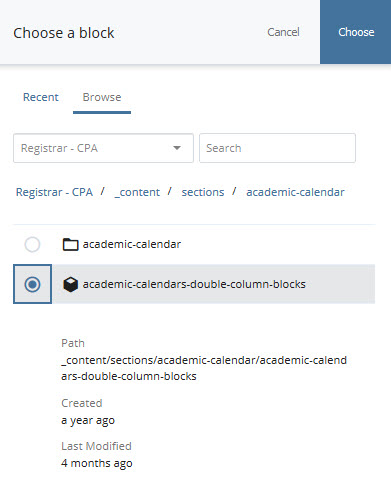
Select Choose Block to bring up the folder browser.

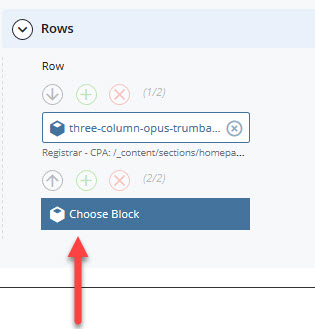
Use the folders to navigate to your content block, then select Choose.
 Back to top
 Simply use the blue up and down arrows to move the content rows around.
 Back to top
 To remove old or irrelevant content from your pages, click the red icon and your row will disappear.
Removing a row from a page does not delete the content block from the server.
Back to topAccordion blocks offer an interactive approach to handling large chunks of content. Accordion blocks display collapsible content panels for presenting information in a limited amount of space.
To create a new Accordion, use the Add Content > Blocks > Accordion menu option.
Organize, add, or remove items
| To add an item, click on the + (plus sign) icon. |
| To move an item up or down in the list, click on the up or down arrow icons. |
| To delete an item, click on the X icon. |
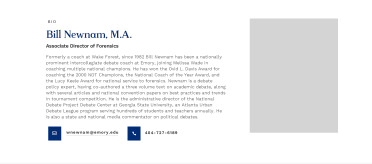
Organize and group one or several people into a list using a Bio or Contact row.
To create a new Bio or Contact Row, use the Add Content > Blocks > Bio or Contact Row menu option.
Horizontal Bio Image :
Browse to the image you want to insert by clicking the file icon ,
navigating to the /_includes/images folder, and selecting your image.
All horizontal bio images must be 600x336px exactly.
Vertical Bio Image :
Browse to the image you want to insert by clicking the file icon ,
navigating to the /_includes/images folder, and selecting your image.
All vertical bio images must be 250x368px exactly.
Contact Row
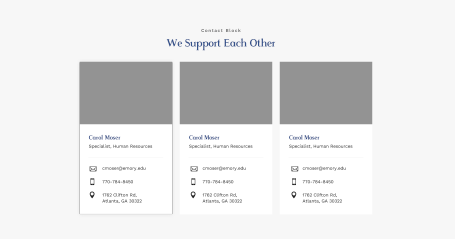
Person Row
Limit to 150 characters.

Single Large Contact
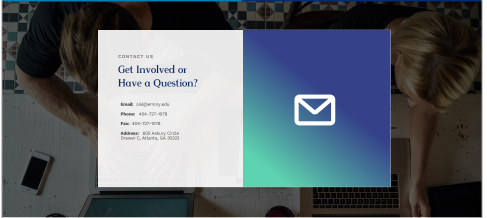
Single Bio
Limit to 400 characters.
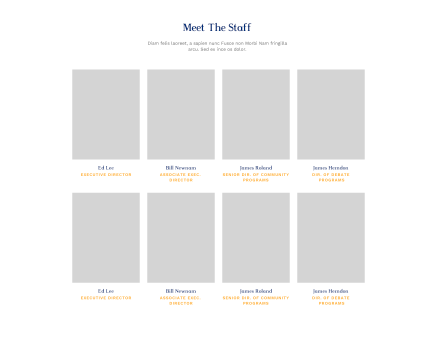
Staff
A Call-To-Action (CTA) has a specific goal such as having your visitor sign up for a newsletter, fill out a form, or be directed to a specific page.
The CTA is brightly colored and stands at the bottom of the page alongside an area for Quick Links which can provide additional resources to your visitor.
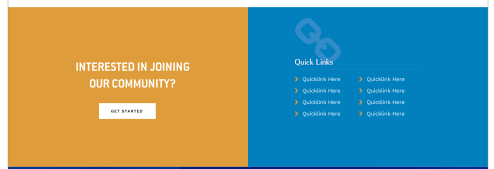
To create a new Call to Action Before Footer, use the Add Content > Blocks > Call to Action Above Footer menu option.
Organize, add, or remove items
| To add an item, click on the + (plus sign) icon. |
| To move an item up or down in the list, click on the up or down arrow icons. |
| To delete an item, click on the X icon. |
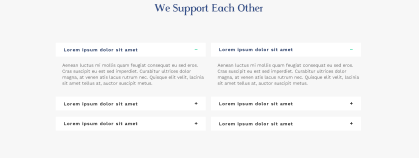
You can arrange text in two columns with a Double Column Text Row.

To create a new Double Column Text Row, use the Add Content > Blocks > Double Column Text Row menu option.
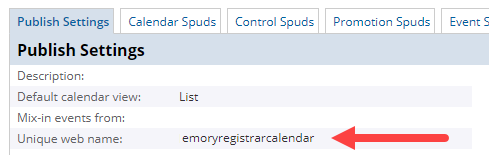
An Event Feed Row will automatically pull in events from your Trumba Calendar.
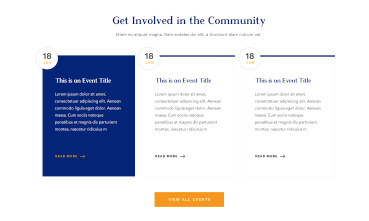
To create a new Event Row, use the Add Content > Blocks > Event Row menu option.

This element will not preview in Cascade. You must publish your page to preview.
Facts Rows are suitable for displaying infographics, statistics, and interesting facts.
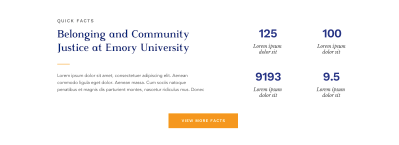
To create a new Facts Row, use the Add Content > Blocks > Facts Row menu option.
Use a Featured Content Block to showcase information and links that are of particular interest or relevance at the moment. Be sure to update this content regularly.
Blue Featured Content Block
Orange Featured Content Block

To create a new Featured Content Block, use the Add Content > Blocks > Featured Content Block menu option.
Featured Content Image :
Browse to the image you want to insert by clicking the file icon ,
navigating to the /_includes/images folder, and selecting your image.
All featured content images must be 640x360px exactly.
Organize, add, or remove items
| To add an item, click on the + (plus sign) icon. |
| To move an item up or down in the list, click on the up or down arrow icons. |
| To delete an item, click on the X icon. |
Showcase multiple images in an interactive image Slider/Carousel using the Image Gallery Block.
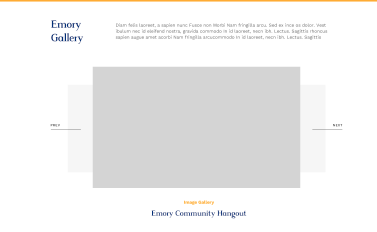
To create a new Image Gallery, use the Add Content > Blocks > Gallery menu option.
Gallery Image :
Browse to the image you want to insert by clicking the file icon ,
navigating to the /_includes/images folder, and selecting your image.
All gallery images must be 800x450px exactly.
Organize, add, or remove items
| To add an item, click on the + (plus sign) icon. |
| To move an item up or down in the list, click on the up or down arrow icons. |
| To delete an item, click on the X icon. |
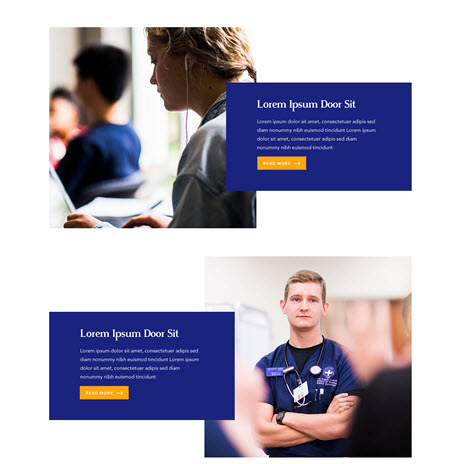
An Image with Content Row includes a single collection or carousel of an image, text and a button link.
To create a new Image with Content Row, use the Add Content > Blocks > Image with Content Row or Carousel menu option.
Image Content Tile Image :
Browse to the image you want to insert by clicking the file icon ,
navigating to the /_includes/images folder, and selecting your image.
All image content tile images must be 570x300px exactly.
Organize, add, or remove items
| To add an item, click on the + (plus sign) icon. |
| To move an item up or down in the list, click on the up or down arrow icons. |
| To delete an item, click on the X icon. |
Quick Links serve as a convenient way to list documents, websites, and other resources that are beneficial to your audience and can help them achieve their goals while visiting your website.
It is most effective to choose to link to resources that are commonly sought out rather than more obscure links and less visited pages.

To create a new Quicklinks Row, use the Add Content > Blocks > Quicklinks Row menu option.
Background: You can choose between a solid background color or a background image. The color of the body text will also change accordingly.
Organize, add, or remove items
| To add an item, click on the + (plus sign) icon. |
| To move an item up or down in the list, click on the up or down arrow icons. |
| To delete an item, click on the X icon. |
Add and cite a powerful and memorable quote on your webpage.

To create a new Quote, use the Add Content > Blocks > Quote menu option.
A Testimonial Carousel is a collection of photos and quotes.
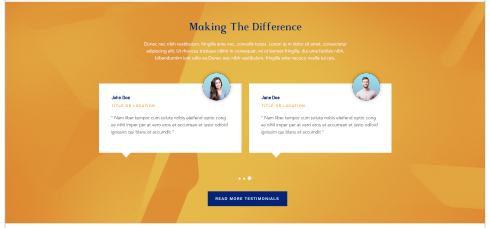
To create a new Testimonial Carousel, use the Add Content > Blocks > Testimonial Carousel menu option.
Background: You can choose between a solid background color or a background image. The color of the body text will also change accordingly.
Testimonial Carousel Image :
Browse to the image you want to insert by clicking the file icon ,
navigating to the /_includes/images folder, and selecting your image.
All testimonial carousel images must be 111x111px exactly.
Organize, add, or remove items
| To add an item, click on the + (plus sign) icon. |
| To move an item up or down in the list, click on the up or down arrow icons. |
| To delete an item, click on the X icon. |
A Tile Row includes groups of images, text and links.
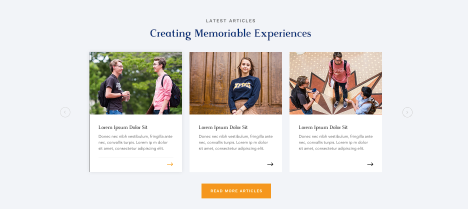
To create a new Tile Row, use the Add Content > Blocks > Tile Row menu option.
Background: You can choose between a solid background color or a background image. The color of the body text will also change accordingly.
Image Content Tile Image :
Browse to the image you want to insert by clicking the file icon ,
navigating to the /_includes/images folder, and selecting your image.
All image content tile images must be 400x225px exactly.
Organize, add, or remove items
| To add an item, click on the + (plus sign) icon. |
| To move an item up or down in the list, click on the up or down arrow icons. |
| To delete an item, click on the X icon. |
Here's where you add bodies of text such as sentences and paragraphs to get your information to the reader.

To create a new WYSIWYG Row, use the Add Content > Blocks > WYSIWYG menu option.
Content blocks are not set to publish; you must publish the pages on which the content block appears.
How to publish a pageTo determine this, navigate to the block, and in the top-right corner, click More > Relationships.
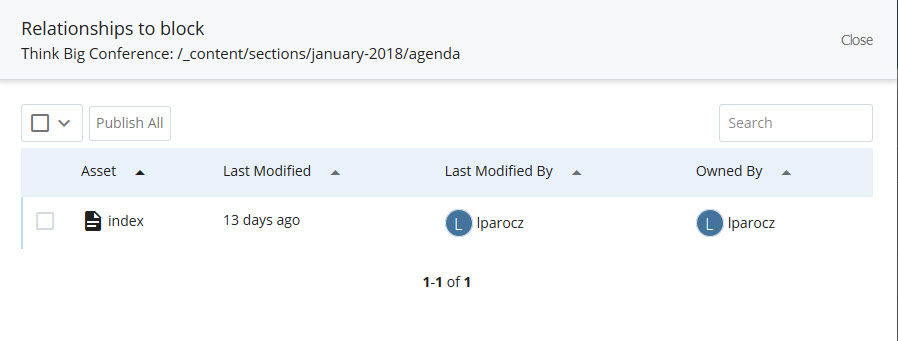
From this menu you can select pages from the list to publish or click Publish All to publish all publishable relationships.
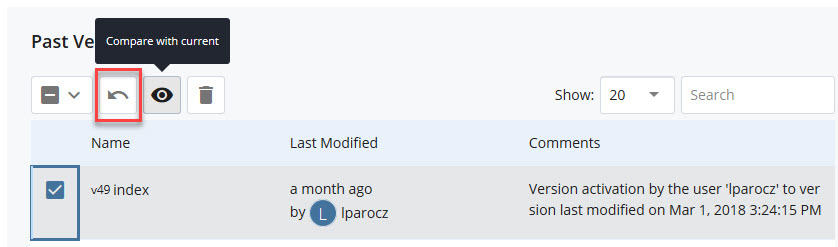
Back to topCascade allows you to view and restore older versions of your Pages, Content Blocks, and Files.
Once on a Page, Content Block, or File, click More > Versions to access the version history in the menu bar.
Here you will see a list of version dates and authors who previously made changes.
If you click on an item from the version history, you can see a preview of its content. The menu grants several options to proceed:
Most importantly, you may Restore the version you have selected.
You can also restore a version in the list view by checking the checkbox next to the version you'd like to restore and clicking the backwards arrow icon:
After activating a previous version, you must Publish that content for it to go live.
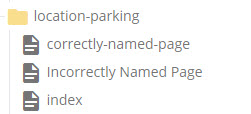
If you need to create a new section for your website, the structure needs to be built in Cascade.
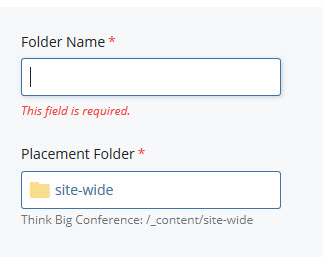
Incorrect: Incorrectly Named Folder
Correct: correctly-named-folder
Last, you need to add an index page to this new folder.
 Back to top
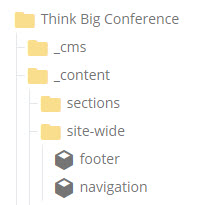
 Some parts of your website persist through every page. In this case, the footer and navigation are both elements that will appear the same and have the same content no matter where the reader is on your website.
To find the footer and navigation, navigate to the /_content/site-wide folder and click on the block you wish to edit.
The main navigation for your website will always be placed horizontally at the top of each page on your site.

Navigation Items
Edit your navigation block at /_content/sitewide/navigation.
When editing navigation links, there are several options to choose from.
Organize, add, or remove items
| To add an item, click on the + (plus sign) icon. |
| To move an item up or down in the list, click on the up or down arrow icons. |
| To delete an item, click on the X icon. |
The footer sits at the bottom of every page. Only members of the CASAA Manager group can edit the footer.
The footer is in the CPA - CASAA site in Cascade, under /_content/site-wide/footer.
You can edit the logo, contact information, column of links, and social media links.