Cascade 8 Overview
Cascade 8 is a major new release that introduces a completely redesigned, reorganized, and responsive interface which uses modal-based actions, has an upgraded search function, an updated WYSIWYG editor, and a new asset choosing and context menu experience.
Contents
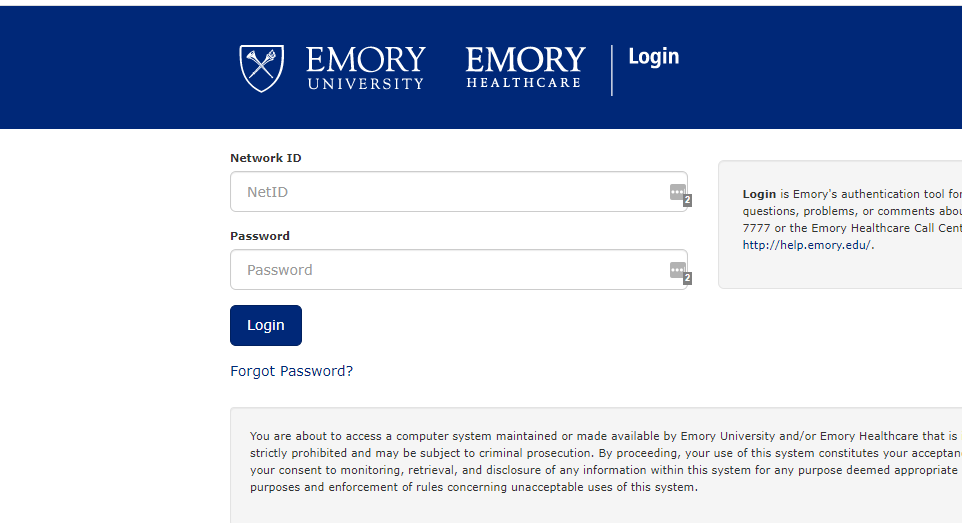
Login
Sign in with your Emory University NetID username and password as you normally would.
Dashboard
The dashboard is the first screen you see when you log in.

Each of these items is called a widget. New widgets can be added with the Add Widget button. Widgets can be rearranged on the page by dragging and dropping. Some widgets can be edited to display different sets of information. All but the welcome widget can be removed. The dashboard can be reset to the default set by clicking on the Reset Dashboard button.
Some widgets display site-specific information while others display user-specific information. For example, the My Content widget displays information that is tied specifically to your user account; other users will see different information that is specifically tied to their account. Site-specific widgets display information related to that site, such as the Stale Content Report, which will display the same information for any user who has access to the same site.
Multiple widgets of the same kind can be configured to display information from multiple sites. For example, if a user has access to two different sites, then that user can have two Stale Content widgets, each configured to display information from a different site.

Click the Cascade icon in the menu bar to return to the dashboard from any page in the CMS.
Keyboard Shortcuts
Press ? (Shift + /) to display available keyboard shortcuts. These can be handy to quickly and easily navigate the system without using a mouse.

Site Menu
Click the Site dropdown menu to view Site Content. Start typing a site name to filter the menu when multiple sites are available. Click the site name to open the base folder for that site.

Asset Tree
Navigating the asset tree is a little different compared to Cascade 7. Click the folder icon or title to expand or collapse its contents. Click the > icon to the right of the folder title to open the folder contents in the main view.

The asset tree is collapsible by the < icon and the CMS will set a cookie to remember your preference.
Display of Assets by Title
In Cascade 8, folders and pages are displayed by the Title metadata field instead of by the file system name. When creating a new asset, the CMS will ask for a title which is automatically converted to a web-friendly system name for the URL with all lowercase letters and hyphens in place of spaces. For this reason, the system name is less important to most users. To see the system name of an asset, simply hover over the title and the system name will display in the tooltip (or right-click on the asset and the Name will display in the Context Menu).
The title is not only displayed for assets in the CMS but also appears on the page in the left-hand secondary navigation and in the page's breadcrumb navigation, as well as the in the title metadata tag which appears as the text on a web browser tab and on search engine results pages.
Besides reinforcing the importance of metadata titles, this change makes the CMS interface easier to navigate and identify assets. For example, CMS search results will display page titles instead of simply "index."
Changing an Asset Title
To change the title of an asset (how it appears in the CMS and on the page), open the asset in the CMS and from the Asset Toolbar, choose Edit (or right-click on the asset and choose Edit from the Context Menu).
Changing an Asset Name
To change the system name of an asset (how it appears in the URL), open the asset in the CMS and from the Asset Toolbar choose Rename (or right-click on the asset and choose Rename from the Context Menu).
Search
Site content can be navigated without the asset tree and may be easier and faster with search. Selecting Search in the menu bar instantly displays a list of recently accessed assets.

Search indexes not only file names but also metadata fields such as title and display name. Start typing and a list of matching assets will instantly populate the list.

Choose Go to Full Search to access advanced options and to display more than the first ten matches.

Advanced options are available to limit search results by Site, by Asset Types (e.g., pages, folders, blocks, etc.), and more specifically by Asset Fields (e.g., Title, Display Name, etc.).
My Content
Site content can also be navigated using the My Content area, accessed from the menu bar.
Recent
The Recent tab displays a table of all recently accessed assets. Assets can be sorted by column and filtered by keywords.

Owned Content
The Owned Content tab displays all assets either created by you or assigned to you as content owner.

Drafts
The Drafts tab displays all assets that were edited but have not been submitted as a new version.
Context Menu
Right-click an asset title on any screen to display the Context Menu.
The Context Menu provides shortcuts to all functions available for that asset in addition to providing the system name and path for the asset.
Asset Toolbar
Any time an asset (page, folder, image, etc.) is open in the main view, the title of the asset is displayed at the top. The buttons to the right of the title (Edit, Publish, etc.) apply to the asset itself that is being viewed, not the contents in the case of a folder.

Folder View Options
When viewing a folder asset, the contents are displayed by default as a list with sortable columns and can be filtered with keywords. Selecting one or more items will activate the Bulk Operations buttons which appear above the table.

Sometimes a folder list view full of images isn't the easiest to browse. Click the View Thumbnails button to see previews of image assets.

Page Editing
Click the Edit button on a page and a modal window will display with the editable content fields. Help text is now displayed inline instead of behind a help icon tooltip.

A Draft is saved automatically as soon as any change is made. Click the Close button to abandon the changes you made to the draft. Click the Save & Preview button to preview the page with the changes. This extra step allows you to continuously edit a draft without submitting a new version every time.

Click the More button to access additional options such as Full Screen Preview or open the Live page.
When you’re ready to save the changes as a new version, click the Submit button. A Comment on the change is automatically made but you can expand with additional information to help document the reason for the new version.

To bypass saving and previewing drafts and content checks when editing a page, click the kebab menu and click the Submit button to save a new version.

WYSIWYG Editor
The WYSIWYG editor has been improved to display menu items of all available actions and menu buttons for commonly used actions.

Hover your cursor over the menu buttons to see a tooltip label of what each one does.
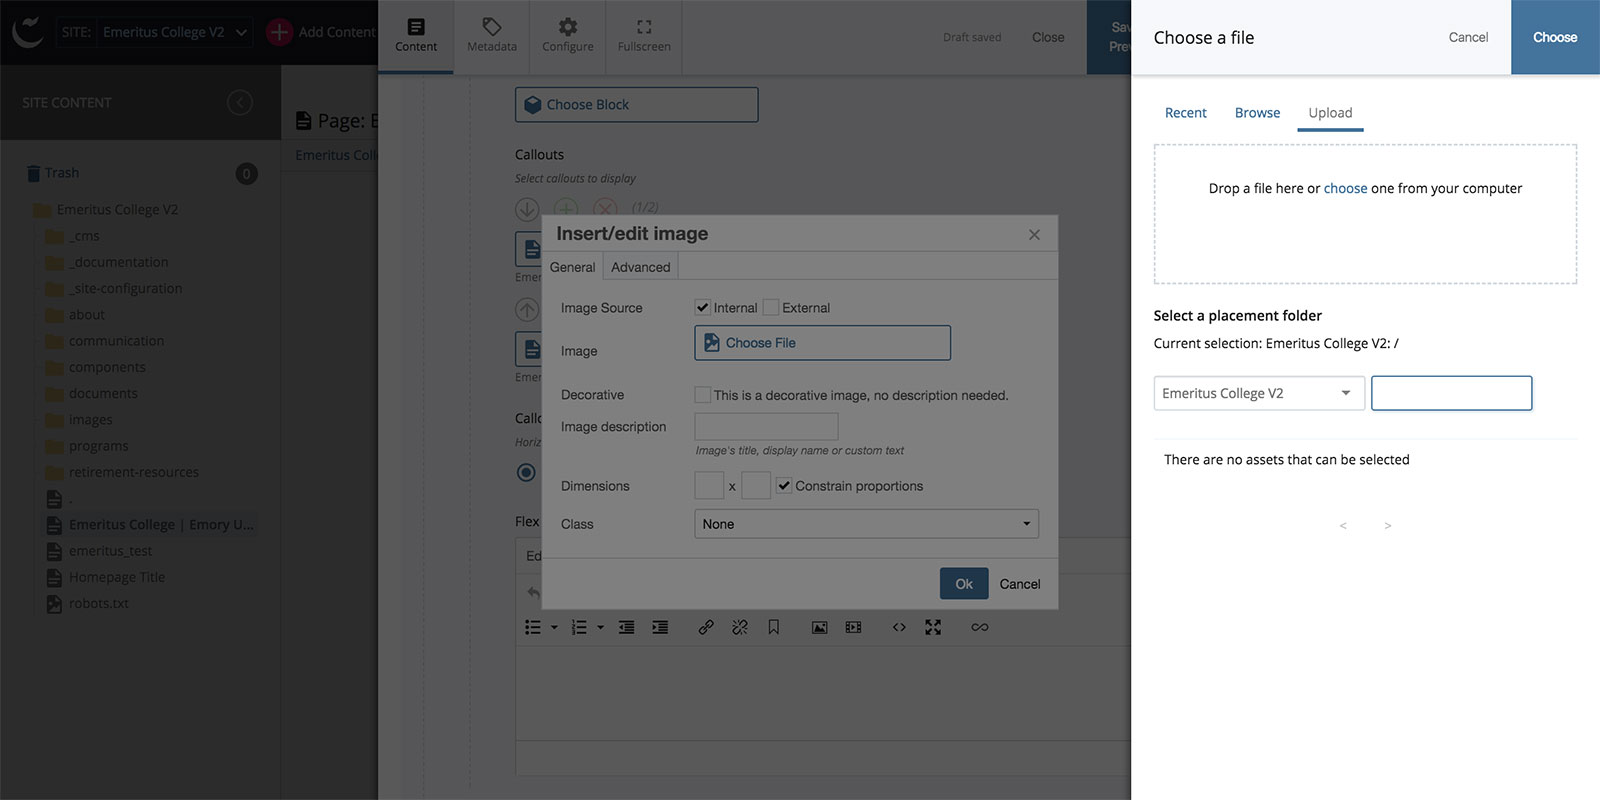
Chooser Panel
The Chooser Panel is displayed when choosing an asset, such as when adding an image to a page.

Recent files are displayed first, but files can be navigated to with the Browse tab. The same filter and View Thumbnails options are available as if viewing a folder.

Choose Upload to add a new file from your computer. Either drag and drop a file into the chooser panel or click the choose link to select a file from your computer. The File Name is automatically generated in all lowercase characters and hyphens in place of spaces. Select a Placement Folder and click the Choose button at the top to complete the process. Note: You may or may not see this option depending on the permissions you have for a particular web site.
Asset Versions
Versions can be accessed from the More menu on an asset. Versions are now numbered to make comparing and communicating changes easier.

Asset Comments
Assets can be commented on by CMS users within the asset viewing interface. Click the Comments button in the asset toolbar to view existing comments and to type in and post new comments to the asset.

The content owner assigned to the asset will get a CMS and email notification that someone commented on their asset. Other users can be tagged within the comment (e.g., @cfhayes) and they too will receive a notification.

Users can Reply, Resolve, and Delete comments. Notifications can be found on the Dashboard and the User Menu in the menu bar.
Publishing and Publish Start Date
Click the Publish button when you’re ready to publish the asset, or Edit the asset Metadata and choose a future Start Date to automatically publish at future date and time.

Add Content
To create a new asset, click the Add Content button in the menu bar and choose from the available options (e.g., Folder with Standard Content Page).

Confirm or choose the Placement Folder, and give your asset a Title.

The system name for the folder is automatically generated from the title in all lowercase characters and hyphens in place of spaces, and the page is automatically given a system name of index.
Tasks
Tasks can be created, assigned, and managed inside the CMS as a form of to-do list for your content.

Add a task from the More menu on a page or from the Tasks tab in the My Content area.
Give the task a Name, Description, Assigned User, set Priority, Due Date, and select any Related Content for that task.
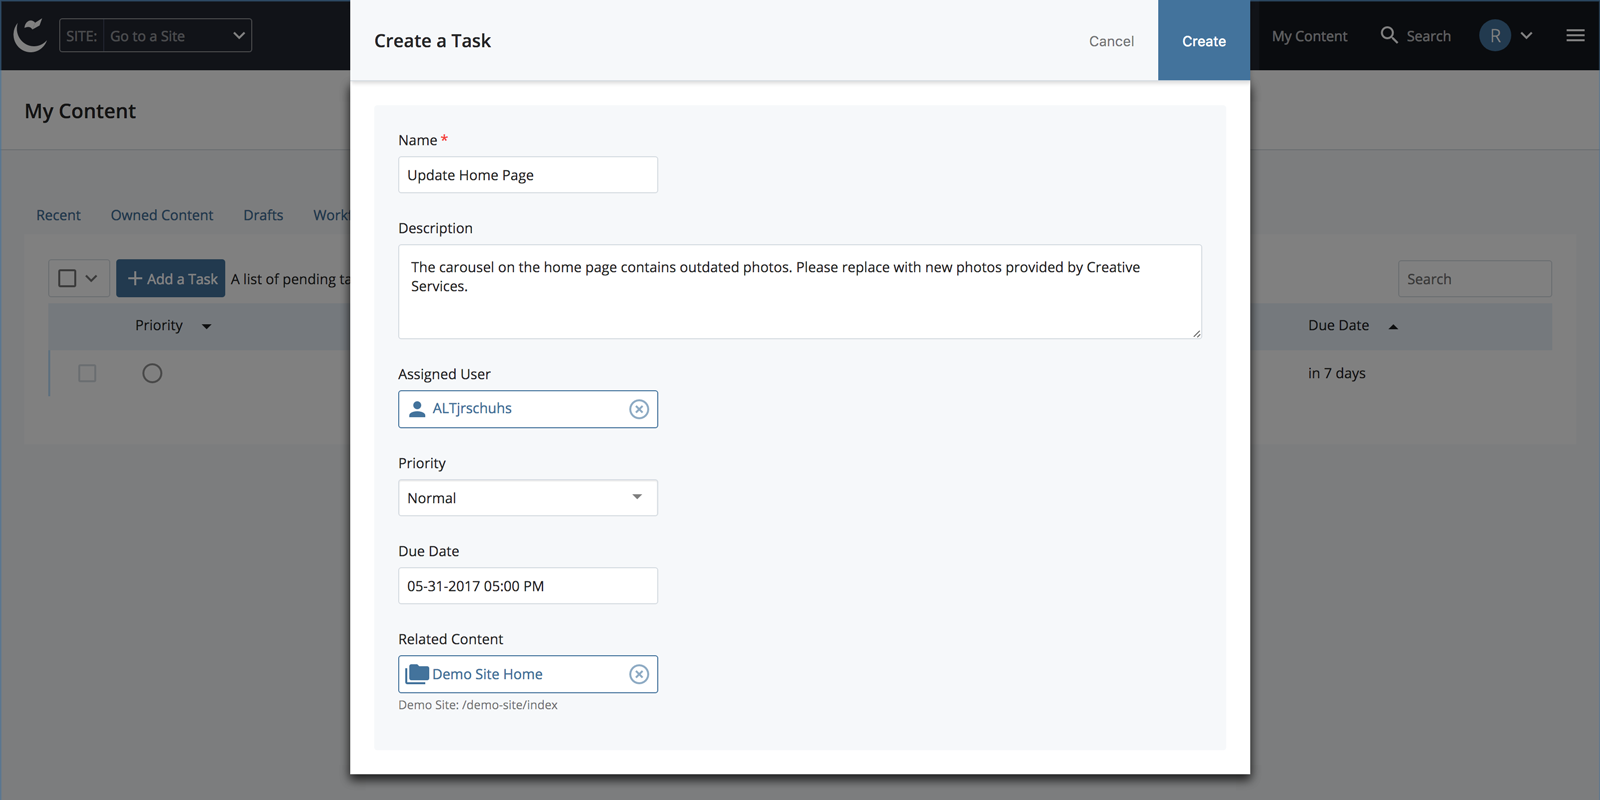
A notification is sent to the assigned user and is displayed in their My Content area and is available as a Dashboard widget. A notification is sent to the assigned user when a task is overdue. Tasks can be edited, comments can be posted, marked resolved, and deleted.
Reports
Reports are available from the hamburger icon in the menu bar.

Different reports are available depending on the role assigned to a user.

When viewing a report, click Filter Results to select a site and additional filter options.
User Menu and Sign Out
The User Menu can be found in the menu bar. Select it to view Settings, a History of recently accessed assets, Notifications, Tasks, and to Sign Out.

For more information from the vendor:
Subscribe to our Listservs to stay up to date with upcoming patches and possible outages: