Hero Image Options
The hero element is used by both homepage types, and offers multiple layout options such as a single static image, random image on page load, timed slideshow, or animated popup overlay (all available in our style guide).
Image Preparation
Prior to assigning your hero image, you must create and upload your images to Cascade. Please see the notes that follow for each image treatment type.
All hero image treatments use one of the following dimensions: 716 x 318, or 960 x 318.
Basic Hero Shot Images
The Basic Image option provides a single image with no slideshow capabilities. This image can optionally contain a link and a caption. To apply this hero element, do the following:
Select the Alignment: Left, Right, or Full-Width
Treatment: select Basic Image
Open the Top Row > Hero Image > Basic or Random Image or Time Slideshow section.
Click on the Plus sign to create a new Image.
- Use the Image 716x318 or 960x318 file chooser to select your image in Cascade.
- Add an optional Caption if desired.
- Add an optional link on the image if desired:
- Internal Page: use this option to link to a page within Cascade.
- External URL: use this option to link to an external website.
- Document: use this option to link to a document within Cascade.
Random Image on Refresh
This option for displays a random hero shot each time the page loads.
To upload images, use the Add Content > Homepage > Hero Shot Image Asset Factory.
Select the Alignment: Left, Right, or Full-Width
Treatment: select Random Image on Refresh
Open the Top Row > Hero Image > Basic or Random Image or Time Slideshow section.
Click on the Plus sign to create a new Image.
- Use the Image 716x318 or 960x318 file chooser to select your image in Cascade.
- Add an optional Caption if desired.
- Add an optional link on the image if desired:
- If you are creating a link to a web page within the Cascade site, click on the blue Choose Page icon for the Internal Link option.
- If you are creating an external link (to a webpage outside of the website or one that is not yet migrated into the CMS), type the full url (starting with https://) into the External Link URL box.
- If you are creating a link to a file (e.g. a PDF or other document), click on the blue Choose File icon for the System File link option.
Timed Slideshow
This option for displays slideshow that cycles through images at a set time interval.
To upload images, use the Add Content > Homepage > Hero Shot Image Asset Factory.
Select the Alignment: Left, Right, or Full-Width
Treatment: select Timed Slideshow
For Slideshow Time Interval, enter a number in seconds. This will set the time interval for how long each image displays.
Open the Top Row > Hero Image > Basic or Random Image or Time Slideshow section.
Click on the Plus sign to create a new Image.
- Use the Image 716x318 or 960x318 file chooser to select your image in Cascade.
- Add an optional Caption if desired.
- Add an optional link on the image if desired:
- If you are creating a link to a web page within the Cascade site, click on the blue Choose Page icon for the Internal Link option.
- If you are creating an external link (to a webpage outside of the website or one that is not yet migrated into the CMS), type the full url (starting with https://) into the External Link URL box.
- If you are creating a link to a file (e.g. a PDF or other document), click on the blue Choose File icon for the System File link option.
Emory Homepage/Blue Bar Slideshow
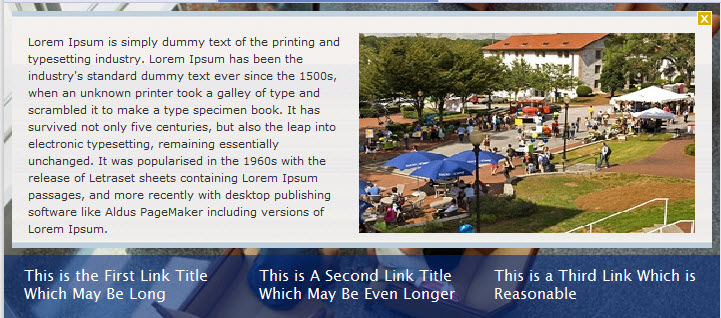
The Emory homepage (“Blue bar”) styled image treatment consists of a randomly displayed image overlaid with an animated blue caption area with three links. Each link launches a popup area with additional content. This element can only be used with the Left or Right Alignment options on the homepage (no full width version).

As with all hero image treatments, you must size and upload your images to Cascade. Images should be sized to 716x318 px. Use the Add Content > Homepage > Bluebar Slideshow > Background Image – 716x318 Asset Factory to place your images in the correct location.
To create the element for your site:
Use the Add Content > Homepage > Blue Bar Slideshow > Slideshow Asset Factory. The slideshow content element will be placed in the /components/home-hero-slideshow folder.
The Hero Shot section will be expanded with a single placeholder image already assigned.
- Use the Image 716x318 or 960x318 File selector to choose your image.
- Add an optional caption if desired.
- Add an optional link on the image if desired:
- Link to Internal Page: use this option to link to a page within Cascade.
- Link to External URL: use this option to link to an external website.
- Link to Document: use this option to link to a document within Cascade.
To add additional, randomly selected background images, repeat these steps to add multiple images to your set.
The Blue Bar section is also expanded. Each blue bar element should contain three links and three corresponding popup slides. See the Examples section that follows for layout options. For each Blue Bar > Slide element, add the following:
Blue Bar Link Text: please enter a brief link title (note that space is limited).
Left or Full Width Column: Enter the text content for your popup slide. If you only populate this entry (and neither of the Right Column options that follow, your popup slide will span the full width of the space).
If you want an additional right-aligned element in your popup, choose one of the following:
- Right Column Image: If you want to add a right-aligned image to the popup slide, use the the Search option to locate your image in Cascade. The recommended image size is 336x200 px.
- Right Column Video Code: If you want to add a right-aligned video, paste in your video code snippet here. The recommended YouTube embed size is 320x180.
Assigning the Element to your Homepage
To assign this element to your homepage, edit the homepage (/index) for your Site.
Expand the Top Row > Hero Image section.
Select Alignment: Right or Left
Select Treatment: Custom
Open the Top Row > Hero Image > Custom Slideshow Option section
Select Custom Slideshow Type: Emory Homepage
Select a slideshow block: click on the Search option, and navigate to /components/home-hero-slideshow to select the slideshow component you created.
Submit your changes to the homepage.
Examples of Popup Layouts
Left column with right column image
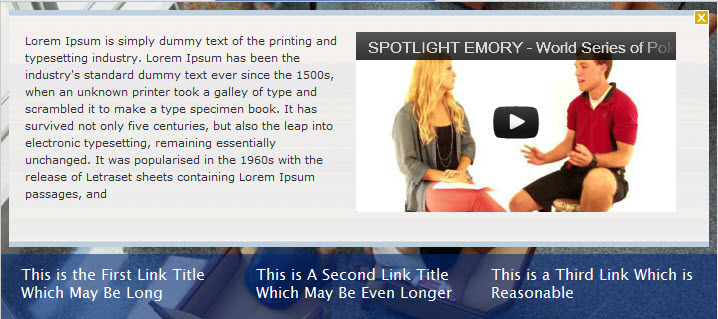
Left column with right column video

Full width text
Custom Slideshow - Other
An additional option for advanced users is to hand-code their own HTML block containing slideshow code. This option is for developers who want a custom slideshow layout or content element. Please note that any custom elements may not be optimized for mobile delivery and will not be supported. Image elements must still use the established dimensions of 716 x 318 or 960 x 318.
To create a custom code block, use the Add Content > Homepage > Advanced - Custom Hero Code Asset Factory. Your block will be created in the /images/hero folder.
Edit the HTML source of the new block to add your custom slideshow code.
To assign the block to your homepage:
- Edit the homepage
- Open the Top Row > Hero Image section.
- Select the appropriate Alignment option (Right, Left, or Full-width).
- Select Custom for the Treatment option.
- Open the Top Row > Hero Section > Custom Slideshow option.
- Click on Select a Slideshow Block > Search to browse for your block. Click Select to assign the block.