Bio Pages
The Standard Template includes bio pages with room for common information, and often groups them on bio section pages (there is specific documentation for setting up bio and other interior pages for this purpose). You can create a new bio page by using the Add Content > Bio > Page Asset Factory.
In this Section:
Metadata
When you create a new interior page, there are a few fields you'll want to use to describe it.
System Name
When you create a new page, you assign a System Name to it, and this creates the filename for the page (ex: colleges.html). System names should be all lowercase, and contain no spaces or special characters. Separate words with dashes (e.g. emory-university-school-of-medicine) or underscores.
If you are creating a bio page, be sure to name it lastname-firstname.
Title
The Title field is used in several places. The Title field is used at the top of a published page, in the large gold text. It is also visible at the very top of the browser window, alongside the site's name (or prefix and/or suffix, if you have configured these) which can be set up in site settings. Some browsers will only display a portion of the title; others will display the whole thing. Search engines may also cut off titles.

Titles are very important for both users and search engines to understand what is on a page, and should thus be very focused. Try to keep this text between 65 and 70 characters. If you are creating a bio page, enter the title as Firstname Lastname, Degree (e.g. John Smith, PhD).
Summary
In the interior page layouts, the Summary field is not displayed; rather it is used for some section page layouts or components. If your interior page is included on a thumbnail section listing, the Summary field is what will be used to tell users about the page. This text should be a brief summary of what users will find when they visit the page, and why it is important. Generally, two or three small sentences is great for this purpose.
Description
The description field is not viewable on your site itself, but rather in Google's search results if Google feels that the text appropriately describes the page. It does not give you better rankings, but it can potentially make it easier for users to find out whether the page has the information they are looking for before they visit. Google will use a maximum of 160 characters.
This image is how Emory University's home page appears in Google search results:

Emory University's description is short and to the point, but informative. Google (and Google's users) responds well to this.
Profile Photo
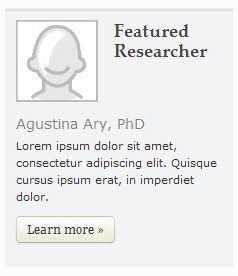
Bio pages themselves display profile photos, and the same photo is also used on the bio section page layout and in the profile component.
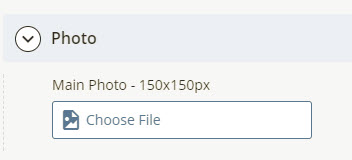
To add a new profile photo, use the Add Content > Bio > Image - 150x150 Asset Factory. You can browse to the image you want to insert by clicking the file icon  , navigating to the images/bio folder, and selecting the image. Main photos must be 150x150 pixels. Once you have uploaded the image, you can assign it to the page.
Page Options
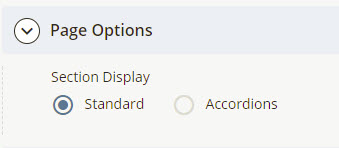
Bio pages consist of multiple sections following the introductory content (name, title, contact info, photo). You can choose to display the settings normally, so that all are visible as a user scrolls down the page, or you can use the accordion layout, in which only one of the sections is visible at a time.
Main Page Content
First Name for Sorting: This entry controls the faculty member’s listing on Section pages.
Last Name for Sorting: This entry controls the faculty member’s listing on Section pages.
Leadership/Administration: This field, if checked, indicates that a person is in leadership. On hierarchical bio section pages, leaders are displayed first, with a slightly different treatment.
Roles/Titles: This set of entries allows you to list a faculty member’s title and affiliations. You can add multiple sets (use the plus icon to add more) here if the faculty member works for multiple organizations.
Biography Text: Please enter a brief biography text in this space.
Contact Information
Office Location
Email: Please enter a valid email address. This will be automatically converted into an email link.
Phone Number: e.g. 404-727-0000
Fax: e.g. 404-727-1111
Website URL(s): Please enter lab websites (external links, starting with http://); add multiple if needed.
Mailing Address
Education
Options are enabled for Degree Type, Degree, School, Location and Year; multiple options enabled
Research and Publications
Research Interests Text: Please enter brief research interest text in this space.
Publications
Publications Source: Please enter title of publication source (i.e., PubMed)
Publications URL: Please enter publications URL (external links, starting with http://)
Publications - Flex Entry: Enter publications content as needed
Teaching
For each course to be added on the list, please enter a title in the Course Name field. This will become the text for the link.
Next, choose a link type:
- If you are creating a link to a web page within the Cascade site, click on the blue Page or Browse [] icon for the Internal Link option.
- If you are creating an external link (to a webpage outside of the website or one that is not yet migrated into the CMS), type the full url (starting with http://) into the External Link URL box.
- If you are creating a link to a file (e.g. a PDF or other document), click on the orange File or Browse [] icon for the System File link option.
 |
To create an additional link, click on the + (plus sign) icon. This will create a new link entry as detailed above. |
 |
To move a link up or down in the list, click the down arrow icon. |
 |
To delete a link, click on the red X icon next to the link. |
Attachments
CV: You can browse to the CV you want to insert by clicking the file button  , navigating to the /documents folder, and selecting the CV document
External Bio/CV URL: Please enter CV URL (external links, starting with https://)
Other Attachments
Attachment Label: Only plain text can be entered in this field
Attachment: You can browse to the attachment you want to insert by clicking the file button  , navigating to the /documents folder, and selecting the document
Sidebar
The sidebar is optional; if you would prefer a wider main column you aren't required to use sidebar. By default, your page will use any sitewide settings that are in place for components. If there are none, the sidebar will not be displayed.
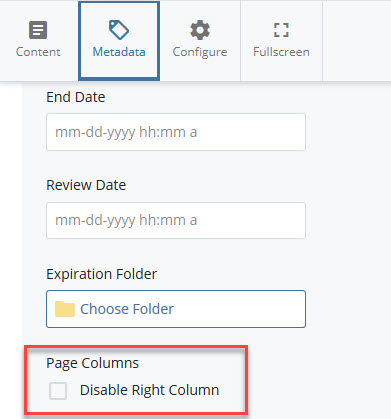
If there are sitewide sidebar settings for components, you can disable the sidebar for your page. Go to the Edit screen and click Metadata, and select Disable Right Column.
If you do decide to use the sidebar on your page, it is set up just like other sidebars.
